

Removing a tree stump from your garden can seem like a daunting task, but it doesn’t have to be. With the right tools and techniques, you’ll find that getting rid of that unsightly stump is more straightforward than you might think. Whether it’s been an eyesore for years or you’re just clearing space for new planting, we’ve got you covered.
In this guide, you’ll discover various methods to tackle the job, from manual removal to chemical treatments. We’ll walk you through each step, ensuring you can choose the best approach for your situation. So, roll up your sleeves—it’s time to reclaim your beautiful garden.
Assessing the Stump
Before you dive into the task of removing a tree stump from your garden, it’s crucial to assess the situation carefully. Not all stumps are created equal, and the right removal method depends on several key factors.
Firstly, measure the stump’s size. Width and height are your primary concerns here. Larger stumps might require more powerful tools or professional help. On the other hand, smaller stumps could be manageable with basic tools and a bit of elbow grease.
Next, consider the type of tree. Different species have varying root systems that can affect removal difficulty. For instance, pine tree stumps, with their relatively shallow root system, are often easier to remove than oak stumps, which have deep, extensive roots.
Assess the stump’s age and condition. Older, rotting stumps are generally easier to remove than fresh ones. They might simply need a push after cutting through any visible roots. However, a fresh stump with live roots requires a more strategic approach.
Lastly, take note of the stump’s location and surroundings. If it’s near buildings, underground utilities, or other important garden features, you’ll need to plan your removal strategy to avoid any damage.
Armed with this information, you’re better equipped to choose the most effective and efficient removal method. Whether it’s manual labor, chemical treatment, or calling in a professional, a well-assessed stump won’t stand in your way for long.
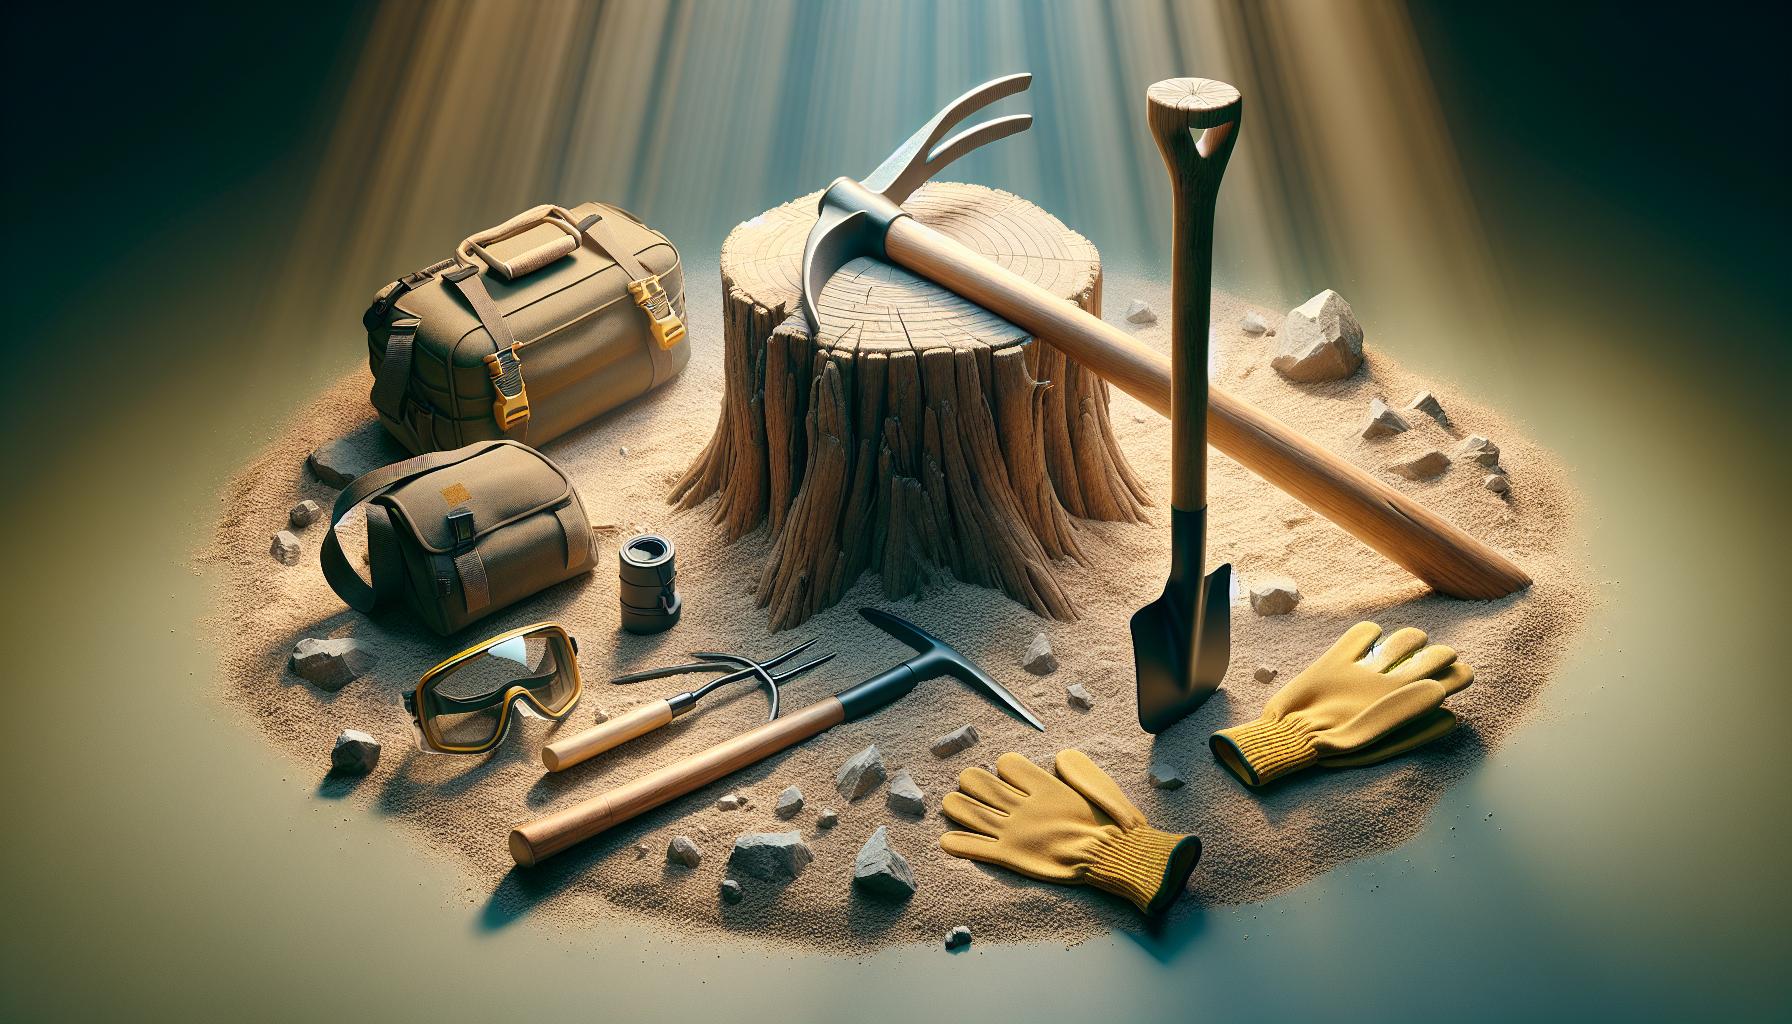
Tools Needed for Tree Stump Removal

Before diving into the tree stump removal process, it’s essential to gather the right tools. Having the appropriate equipment at your disposal not only makes the job easier but also ensures it’s done safely and efficiently. Here’s what you’ll need:
- Stump Grinder: The most effective tool for stump removal, particularly for larger stumps. You can rent one from a local hardware store if you don’t own it.
- Chainsaw: Essential for cutting the stump as low to the ground as possible before grinding it down. This step reduces the amount of work the stump grinder has to do.
- Shovel: You’ll need a sturdy shovel for digging around the stump. This is crucial for exposing the roots that need to be cut or ground away.
- Mattock or Pickaxe: Useful for loosening the soil and cutting through the smaller roots around the stump.
- Safety Gear: Don’t skimp on this. Safety goggles, heavy-duty gloves, and ear protection are a must when using power tools.
When you’ve got your tools ready, assess the situation carefully. If the stump is exceptionally large or if it’s located near utilities or buildings, consider consulting a professional. Removing a tree stump can be a straightforward task with the right approach, but it’s also one that requires caution and respect for the power of the tools involved.
Always start by cutting the stump down as close to the ground as possible with your chainsaw. This reduces the amount of grinding work required and the overall time spent on the task. After cutting, use your shovel and mattock to clear away rocks and debris from around the stump. This preparation ensures that when you’re ready to use the stump grinder, you can do so efficiently and without unnecessary obstructions.
Remember, each stump and garden situation is unique. Adjust your use of tools and approach accordingly to ensure the job is done right.
Manual Tree Stump Removal Methods
When dealing with smaller tree stumps, manual removal is often a viable and cost-effective option. This approach requires a combination of tools and a good dose of physical effort. Shovels, mattocks, and pickaxes are your go-to tools for digging around the stump. The goal is to expose as much of the root system as possible.
First, use your shovel to remove the soil surrounding the stump. This exposes the larger roots that anchor the stump to the ground. A mattock or pickaxe can be particularly helpful for cutting through these roots. By systematically chopping at the roots and pulling them out, you’ll gradually loosen the stump. It’s a labor-intensive process, but with persistence, the stump will start to wobble, indicating you’re making progress.
Chemical Assistance
While not purely a manual method, incorporating chemical stump removers can significantly ease the process. These chemicals accelerate the decomposition of the stump, making it softer and easier to break apart. After applying the chemical according to the manufacturer’s instructions, you’ll need to wait several weeks or even months for it to take full effect. During this time, the stump’s structure will weaken, allowing you to remove it with less effort.
Remember, safety is paramount when using chemicals. Wear protective gear and ensure that children and pets stay away from the treated area. Combining the chemical treatment with manual removal techniques can dramatically reduce the labor involved, making this approach suitable for stumps that are slightly larger or more resilient.
Digging, chopping, and applying chemicals are just a few ways to tackle a tree stump by hand. Each stump presents its own set of challenges, so be prepared to adapt your strategy as you learn more about the stump’s structure and root system.
Chemical Tree Stump Removal Techniques
When manual labour doesn’t cut it or you’re dealing with a particularly stubborn tree stump, Chemical Removal Techniques come into play. This method involves using chemical stump removers that contain potassium nitrate, which accelerates the decomposition process, making the wood soft and easier to remove. It’s a method preferred for its effectiveness on stumps that refuse to budge, despite your best efforts with shovels and axes.
First up, drill holes into the top of the tree stump, spaced around 3 to 4 inches apart. The holes should be deep, roughly 8 to 12 inches, to ensure the chemicals can penetrate deeply. Next, fill these holes with the chemical stump remover following the manufacturer’s instructions. Water is then added to facilitate the decomposition process, which can take several weeks to several months, depending on the size and density of the stump.
Safety is paramount when handling chemicals. Always wear protective gear like gloves and safety glasses to safeguard yourself from harmful exposure. It’s also essential to keep children and pets away from the treated area to prevent accidental ingestion.
For a more eco-friendly approach, consider using Epsom salt as an alternative. Although slower, this method naturally dries out the stump, making it easier to break down over time. Simply fill the drilled holes with Epsom salt, cover the stump with a tarp to keep it moist, and let nature do its work.
While chemical stump removal requires patience, it’s an effective solution for those tough, lingering stumps. Combining this method with the manual techniques mentioned earlier can provide a comprehensive approach to stump removal, tailored to the unique challenges presented by your garden landscape. Remember, each stump may respond differently, so it’s worth experimenting with various techniques to find the most effective solution for your situation.
Reclaiming Your Garden
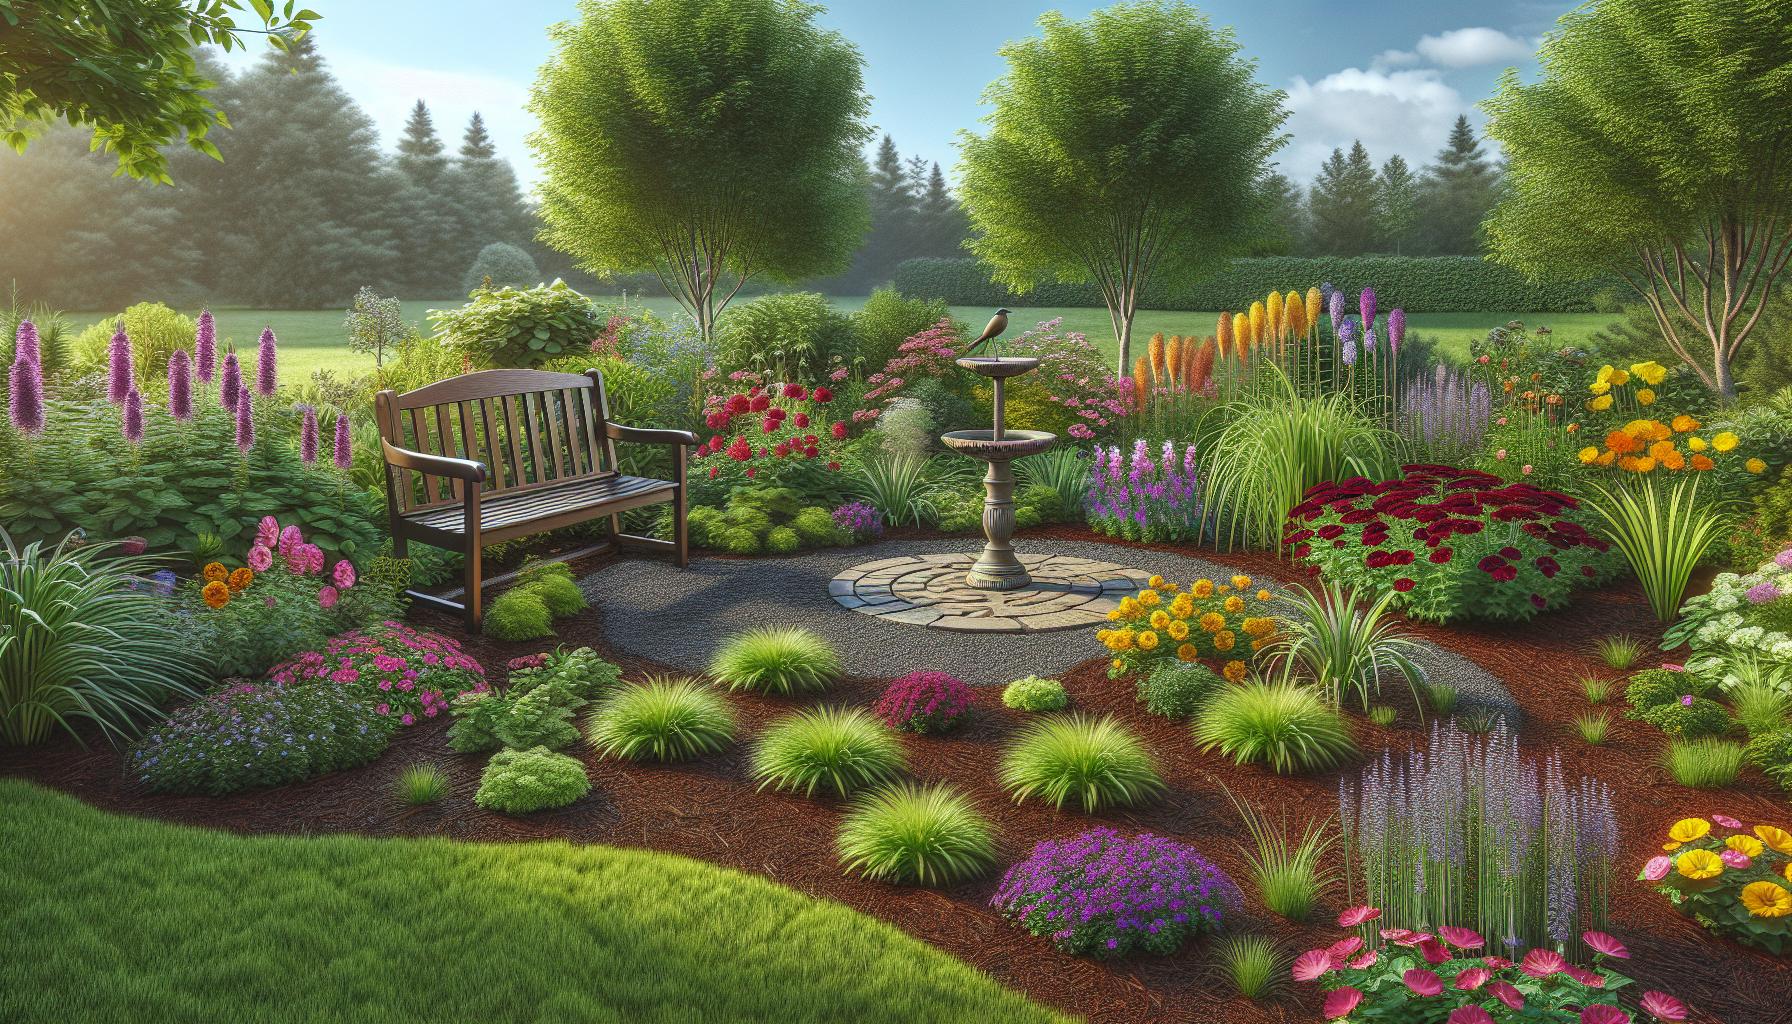
After the tree stump has been removed and your garden cleared of unwanted wood, it’s time to reclaim and rejuvenate the space. The removal of a tree stump frequently leaves behind a significant void, but with the right approach, you can transform this space into a thriving part of your garden. Whether you’re considering planting new flora or redesigning the area, the possibilities are endless.
Preparing the Soil is crucial. The tree stump removal process can compact the soil and deplete nutrients, so it’s essential to loosen the compacted earth and enrich it with quality topsoil or compost. Aerating the space will ensure new plants have the room to spread their roots. Adding fertiliser will replenish nutrients lost during the stump removal process, setting a robust foundation for new plant life.
When considering New Plantings, think about what you’d like to achieve. If you’re looking to add a splash of colour, opt for perennial flowers that will return year after year. For more privacy or shade, planting a new tree could be the way forward. However, remember to choose a species that won’t outgrow the space. Vegetable gardens or herb patches are perfect if you’re aiming for something both beautiful and practical.
Maintenance and Care for the newly reclaimed area can’t be neglected. Watering appropriately, especially during the early stages of growth, and regular weeding will protect and nurture your new plants. Mulching can help retain moisture, suppress weeds, and add to the aesthetic appeal of your garden.
Incorporating Garden Features such as a bench, fountain, or bird bath can further enhance the beauty and functionality of your garden. These features can create focal points, making your garden not just a sight to behold but also a serene retreat.
As you embark on this journey to reclaim your garden, remember that the space where a stubborn tree stump once stood can become the most vibrant and lively part of your outdoor sanctuary. With careful planning and a bit of creativity, you’ll soon realize the potential that was hiding beneath the remnants of the old.
Conclusion
Transforming the area where a tree stump once was into a thriving part of your garden is a rewarding endeavour. By preparing the soil and choosing the right plants or garden features, you’re on your way to creating a beautiful and functional outdoor space. Remember, regular maintenance such as watering, weeding, and mulching is key to the health and growth of your new plants. Embrace this opportunity to enhance your garden’s beauty and enjoy the process of watching your outdoor sanctuary come to life. With a bit of effort and creativity, what was once an empty spot can become the highlight of your garden.
Frequently Asked Questions (FAQ)
What should I do first to reclaim my garden after removing a tree stump?
After removing a tree stump, the first step is to loosen the soil to undo any compaction, enabling roots of new plants to grow more easily.
How can I add nutrients to the soil in my garden?
Adding nutrients to your garden soil can be done by incorporating compost or a balanced fertiliser, to revitalize and enrich the soil for new plants.
What are some ideal new plantings for my reclaimed garden space?
Ideal plantings for a reclaimed garden space include perennial flowers, shade trees, or a vegetable garden, depending on your garden’s needs and your personal preferences.
Are there any maintenance tips for ensuring the health of new plants?
Yes, regular watering, weeding, and mulching are key maintenance tips to ensure the health and growth of your new plants in the reclaimed garden space.
How can I enhance the beauty and functionality of my garden?
Incorporating garden features like benches or fountains can significantly enhance your garden’s beauty and functionality, making it a more enjoyable and inviting space.